Wednesday, June 1, 2016

My Creative Scrapbook June kit reveal

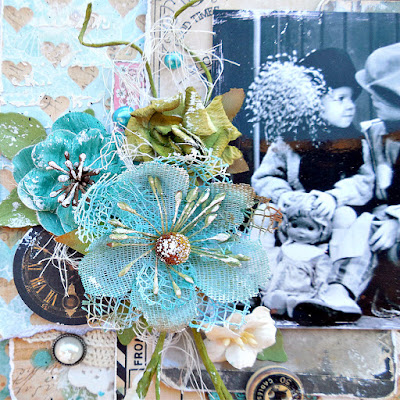
Sharing my layouts that I created using the beautiful June kit from My Creative Scrapbook. 


Be sure to pop over to My Creative Scrapbook and grab yourself a kit. It's chock full of beautiful goodies that are sure to get your creative mojo going. I can't wait to see your creations. Thanks so much for dropping in. I appreciate you!

Friday, April 22, 2016

For Reneabouquets

Good morning, lovely friends! Today I'd love to share my latest layout created for Reneabouquets Etsy and Reneabouquets.com
For this page I used a mixture of papers from Prima, Marion Smith, and Kaiser Craft with a Bo Bunny base. I started by applying a thin layer of clear gesso to the background. Once dried I added a bit of random stamping and some splatters of acrylic paint as well as Shimmerz Princess and Prima Color Bloom Plumeria. Next I added more texture with texture paste and two different stencils. While that was drying I began to build my photo mat layers, inking the edges for definition, and then matting them on cardboard for added dimension. After adhering my layers I starting filling in my design with a bunch of goodies from Reneabouquets. As a finishing touch I then added small pool/drips of the Plumeria to the design and then a few more splatters.
 Using gel medium and a spatula I applied the micro beads, scraping the background randomly for added texture and color.
Here is my supply list with direct links of Reneabouquet products I used for this page:
Prima Junkyard Findings Metal Trinkets Clock Hands

Thanks so much for dropping in and letting me share with you! I hope you have a creative day!

Tuesday, March 8, 2016

March reveal for My Creative Scrapbook


Hey there all! Today I'd love to share the first half of my projects I created using the beautiful March kit from My Creative Scrapbook.
To start I went around the background and lightly dabbed gesso here and there. Using the stencil from the kit along with texture paste I added texture around where the photo layers were going. After inking all the layers and adhering the together I mounted them on cardboard before adhering to the background. Then I added the embellishments, finishing it off with splatters of white and black acrylic paint as well as splatters of Shimmers "Princess"
And my second layout
On the background I added some texture using a stencil and texture paste. While it was still drying I added color by spraying a bit of Prima's "Cotton Candy" and drops of Tattered Angels "Rouge"followed by splatters of black acrylic paint. After it finished drying I randomly stamped around where my photo layers were going with a script stamp and a foliage stamp. I inked the edges of my photo layers and after adhering them together I mounted them on a piece of thin card board for dimension. For more interest and texture I tucked in some cheese cloth and placed some drywall tape here and there, then scraping just a bit of texture paste over it.
And here's a look at the kit loaded with lovely Prima products
Thanks so much for taking the time to stop in and let me share with you! Hope you have a creative day!
Tuesday, February 9, 2016

Epic For Reneabouquets


Good morning, my lovely crafty friends! Today I'd love to share my latest creation for Reneaboquets Etsy Shop and Reneabouquets.com featuring a bunch of goodies from the shop.
For this I used a mixture of papers from Marion Smith Designs. I have quite a bit of layering and texture packed into this one. I started my background  by lightly dabbing gesso in random areas, adding splatters of white and black acrylic paint, then adding more texture using the "ledger" stencil and texture paste. After adding more paper layers, tucking in a few embellishments here and there, I added a touch more stenciling. Once I had the majority of the embellishments in place I added touches of color to the background using Prima Color Bloom sprays before adding a few random pearls. As a finishing touch I dabbed a bit more gesso on random spots throughout the layers.
Here are some close ups of the details...
And here's my supply list from Reneabouquets with direct links to the shop:
And don't forget to enter the Reneabouquets Contest...
Fall In Love With Reneabouquets Contest With Giveaway!!
Reneabouquets goes hand in hand with adding those romantic touches to your crafting Do It Yourself Projects, and here is your chance to take home this Oh So Romantic Prize Package (pictured) featuring a few of those items!!
Rules:
1. Create a project (on or off the page) that features any product carried in the Reneabouquets.com Store or Reneabouquets Etsy.
2. Your project can be any style and does not have to be a Valentine's project.
3. Add your Project to this post by February 14, 2016. Deadline 12:00 a.m. Eastern Time Zone to be entered into the contest.
4. Check back on February 15, 2016 to see if you have won the random drawing. (Drawing is done on an unedited video to insure fairness)
5. Contest is open to U.S. Residents and International
6. Have lots of Fun!!!
Good Luck!!! Hugs ~Renea


Thanks so very much for coming by! Hope you have a creative day!

Cherish for Let's Get Sketchy

Good morning all! A brand new sketch has been revealed at Let's Get Sketchy and I have my inspiration page to share with you based off this week's sketch.
 I used papers by Blue Fern Studios with flowers, lace, and buttons from my stash. On my background I've done just a bit of stamping, followed by stenciling with texture paste. Then finishing up with a few splatters of white and black acrylic paint as well as a few splatters of  Blue Fern spray in Cotton Candy. I took the three photo design from the sketch and layered them just a bit closer together and mounted them on thin cardboard from dimension.
And here's this week's fabulous sketch...
Now it's your turn and I can't wait to see your takes! Thanks so much for dropping in! Hope you have a creative day!